
Every marketer has experienced it at one point or another: a blog post, once carefully crafted and optimized, now sits stagnant in the search results. You have a feeling it’s not living up to its full potential, but aren’t sure how to give it the boost it needs.
Reoptimizing your existing blogs can be an easy way to give underperforming content a second shot at high rankings, and it’s a good strategy for time-strapped marketers who can’t create a new post from scratch. Although not every blog you’ve created will be a good candidate for reoptimization, those that are can give you major returns – we’ve experienced it firsthand! Here are the five steps our digital marketing experts typically use:
Step 1: Identify blog posts to reoptimize.
The first step is to select the blog posts you’ll be working on. Remember some keywords and markets are just too competitive for your content to break through the clutter without a major overhaul. For now, you want to focus on content that could potentially rank well without being completely reworked, and that means choosing pieces that already rank on the second or third page of search results. Optimizing these posts will give you the best shot at breaking onto page one and seeing a return on your time investment.
Use a tool like Ahrefs’ Site Explorer to help you select blog posts for reoptimizing. You’ll be able to see your current pages’ keyword rankings, which will give you insight into what posts offer the best reoptimization potential.
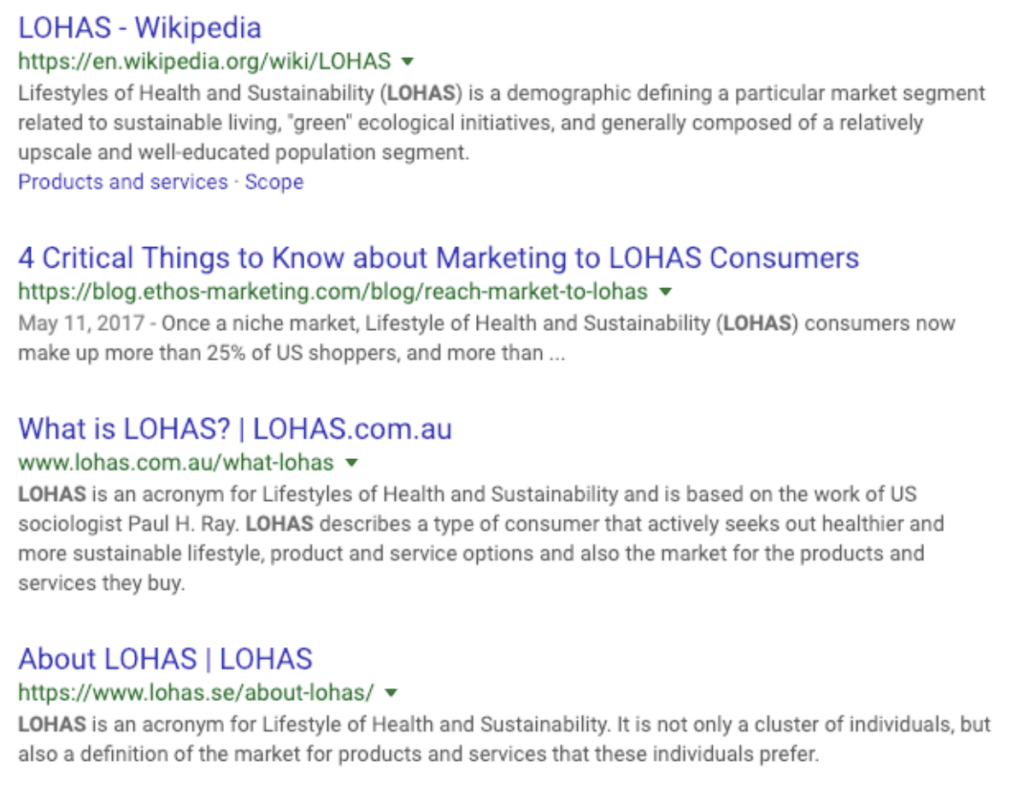
At Pure Visibility, for example, we have a blog post on the LOHAS demographic, which is currently ranking number 17 for the term “LOHAS.” The page 2 position of our post indicates that it has potential, but currently isn’t strong enough to break onto page 1. Reoptimizing this blog post is a good bet, but we have to look further.

When we search for “LOHAS” in Google, we can see that we face some stiff competition from high domain websites like Wikipedia—but it could still be possible to move onto the first page with the right optimization approach.
When evaluating whether a post is worth reoptimizing it’s important to consider three things:
- current page ranking,
- current keywords, and
- the competitors you’ll have to outperform.
The best blog posts for reoptimizing will be ones that rank on the second or third page for a keyword (or a handful of closely related keywords) with decent search volume and at least a couple competitors you could reasonably kick off the first page. If all ten first page results are mammoths like Wikipedia and Huffington Post, it’s probably best to move on.
In the case of our example post, however, some of our competitors seem to be comparatively lesser-known sites we could potentially surpass. So we could confidently select our “LOHAS” blog post as one to reoptimize.
Step 2: Check that your content was optimized the first time.
Once you’ve picked the posts you’ll be reoptimizing you should take the time to make sure they were optimized in the first place.
Although you’ll be making additional tweaks in later steps, for now you want to check that the basics of content optimization were covered by asking yourself these questions:
- Is my content well-written? (Easy to understand, free of spelling and grammatical errors, etc.)
- Does my content sound natural?
- Is my content structured with heading tags (h1, h2, h3, etc.) so that it is easy to read?
- Is my title tag 55 characters or less, and does it incorporate my target keyword?
- Does my meta description explain the content of my page and include a call to action?
- Did I include image alt text for my images?
- Did I even include images?
These are simple questions, but you would be surprised at how often they get overlooked. Perhaps the original post was keyword stuffed in a desperate attempt to rank well, or proper formatting was overlooked in a rush to go live. Maybe the author was simply unaware of how many elements could be optimized. (In which case we recommend you check out our content optimization checklist.) Whatever the situation, doing a quick run-through of where you currently stand will help you identify any issues that need to be addressed before you really dive into reoptimization.
Step 3: Update your title tag and header.
So what should you tackle first when reoptimizing? We suggest your title tag and tag. As two highly-influential factors when it comes to keyword rankings, your title tag and main heading tags should be in tip-top shape to give you the best shot at making it to page one.

This is when you need to know what keywords your blog post already ranks for. Use a tool like Ahrefs to check your keyword rankings—you may find you’ll want to shift your target keyword to something more attainable. For example, when we reoptimized our blog on cached pages we discovered better keywords than those we had been targeting. Originally we optimized for terms related to “site caching” but a quick look at the post’s keywords revealed we were ranking on the second page for “cached pages” and multiple variants of that keyword. It therefore made more sense to target that more attainable keyword group, and we changed our title tag and main heading tag to reflect that.
When reoptimizing your blog post, it’s important to keep your title tag to an appropriate length (55 characters or less) and to structure your content hierarchically . Each blog should have only one h1 tag, with additional heading tags (h2, h3, etc.) used as subheadings.
Step 4: Incorporate answers to commonly asked questions.
After the technical elements of your blog have been addressed, it’s time to move on to the most time-consuming (but important) aspect of reoptimization: content expansion. Comprehensive and relevant content is one of the top three ranking factors for Google, so fixing thin content can have a huge impact in rankings. Even if you think there’s no room to improve, a quick Google search can help you find ways to elaborate.
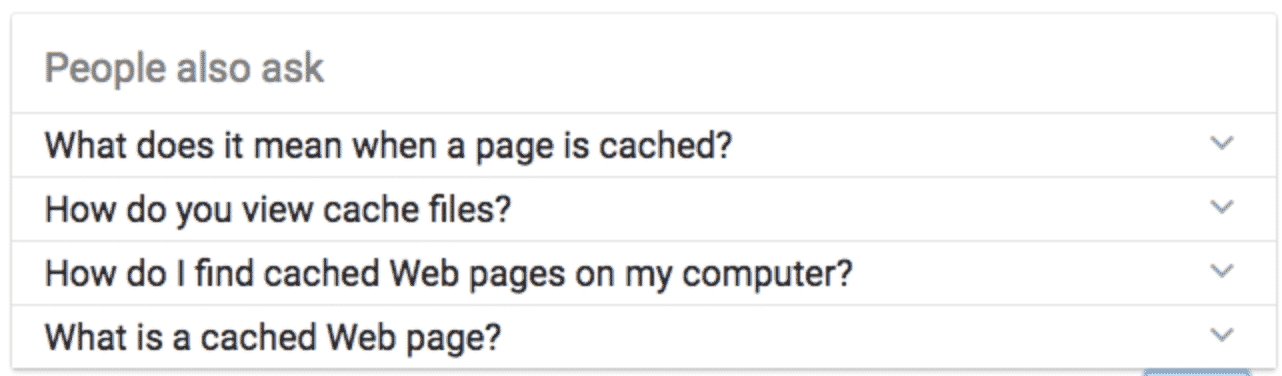
For example, doing a search for “cached pages” brings up a “People also ask,” graph, giving us insight into the questions searchers have around the topic. This is a great opportunity to add more content to the blog post while still providing value.
Of course, not every Google search will be accompanied with “People also ask,” but there are other ways to find content ideas. Scrolling to the bottom of the search engine results, for example, shows you topics related to yours. The SEO consultants at Pure Visibility also find the free tool Answer the Public useful in identifying frequently asked questions (and easy areas of content expansion)!
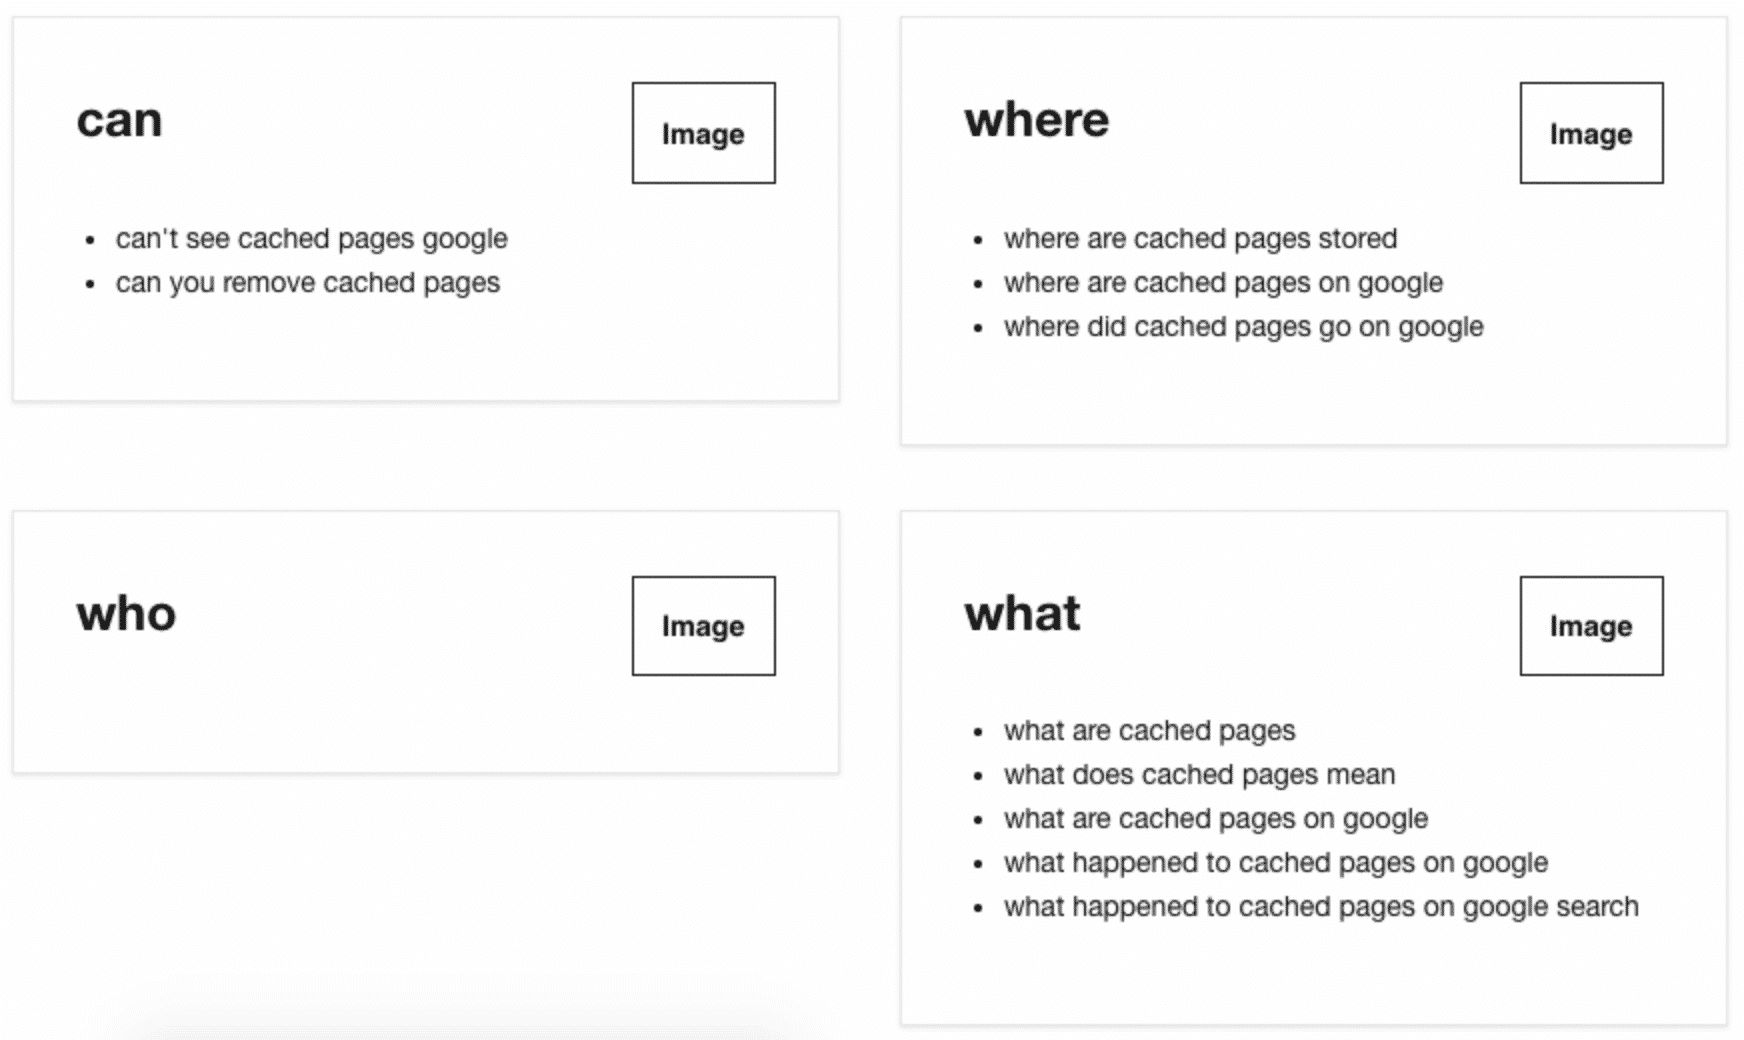
When we did our search, for example, we found that people were looking into removing spammy content from the cache and preventing Google from caching their site’s pages. These aren’t topics we would have thought to cover, but doing some quick research gave us opportunities to expand and make our content more relevant to searchers.
Step 5: Add images.
Think you’re done? Not yet! Although your new, comprehensive content is useful, it’s probably not all that pretty to look at. User experience is an important part of search engine rankings, so you want to hold your readers’ interest, and that’s where images can help. Incorporating infographics, images, and other media can be a great way to keep readers on your page longer, which in turn indicates to Google that your post is valuable. And although Google can’t “see” images like it can text content, it can crawl the alt image text, which also contributes to search engine rankings.
While it’s helpful to use your keywords when adding alt text to your images, be sure you are accurately describing the image, not just keyword stuffing. The original purpose of alt text is to help viewers know what they are missing if an image did not load, and to provide accessibility for vision-impaired visitors.
For our Google cached page blog post, this part of the process was as simple as adding a couple screenshots to illustrate our point.
Reaping the reoptimization rewards
Although the steps are not difficult, reoptimizing old blog posts, when done well, will still take some time. But investing even an hour in reoptimizing your blog can get huge returns. Throughout this post we’ve used our cached pages blog as an example, which we spent about an hour reoptimizing. Instead of building a whole new post, we were able to give our blog the boost it needed! At the time of this writing, our post ranks for over 500 organic keywords that bring in an average of 238 organic visitors a month. And although your results may vary, it’s a good example of what reoptimization can accomplish!


Want to learn more about digital marketing? Sign up for our newsletter to stay up-to-date on our latest blogs!